
TIG spot welding (also known as gas tungsten arc spot welding) is a specialized technique that uses a tungsten electrode to generate an arc that melts a localized area of overlapping metal sheets, forming a fusion spot without the use of filler material. Unlike resistance spot welding, which relies on electrical current passing through the workpieces, TIG spot welding uses arc heat and inert gas shielding, making it particularly suitable for thin sections, stainless steel, and applications where surface appearance matters.
Key Characteristics
The main advantages are minimal distortion, excellent surface appearance due to argon shielding, and versatility across materials including stainless steel, titanium, nickel alloys, and thin carbon steel. However, it is limited to thin sections (typically under 3mm) and has lower productivity than resistance spot welding for high-volume production. It also requires precise control of current and timing by the operator.
I. Joint Types and Application Scope
Lap joints are the most common configuration for TIG spot welding, typically used on sheet thicknesses from 0.3mm to 3mm. This includes stainless steel decorative panels, thin enclosures, and cabinet assemblies. Edge joints and temporary positioning tacks for pipe assembly are also practical applications. Butt joints are generally not recommended for load-bearing spot welding because the weld cross-section is limited; continuous welding should be used instead for structural connections.
II. Preparation Before Welding
is the most critical step for consistent spot weld quality. Contaminants such as oil, rust, scale, and dust must be removed from both surfaces at the weld location. For stainless steel, use a dedicated grinder and wipe with acetone or alcohol. For aluminum, the oxide layer must be mechanically or chemically removed. Failure to clean properly leads to porosity and weak fusion.
: The workpieces must be clamped tightly together with minimal gap — ideally less than 0.2mm. Gaps cause heat loss and result in incomplete fusion. Reliable grounding is essential; place the ground clamp as close to the weld zone as practical. Adequate wind shielding must be provided to prevent argon from being displaced.
: For carbon steel and stainless steel, use ceriated or thoriated tungsten with DCEN (direct current electrode negative). For aluminum, use pure or zirconiated tungsten with AC (alternating current). The tungsten tip should be ground to a pointed cone with an included angle of 20°-40° for DC welding, or a rounded tip for AC welding. For spot welding applications, a 3-5mm stick-out is recommended to maintain arc stability and minimize spatter.
III. Parameter Control
1).Current and time are the two primary parameters, with shielding gas flow playing a supporting but essential role. For a given material and thickness, these three factors must be balanced to achieve good fusion without burn-through.
2).General rule: For thinner materials, start with lower current and shorter time. For thicker materials, increase both but avoid excessive time, which causes burn-through. For aluminum, expect to use 20-40% higher current than for stainless steel of the same thickness.
3).Torch operation: Maintain a short arc length of 1.5-3mm. A longer arc spreads the heat and reduces penetration. The torch should be held perpendicular or with a slight tilt, with the nozzle centered over the overlap seam. Allow 2-5 seconds between spots to prevent heat buildup and distortion. Minimum spot spacing should generally be 15-25mm to avoid overlapping heat-affected zones.
IV. Two Operating Modes
Most modern TIG machines include a built‑in spot timer. With this mode, the operator sets the weld duration, presses the switch, and the arc automatically extinguishes after the set time. This yields consistent, uniform spots and is ideal for production work.
For machines without a spot timer, the operator must manually control the arc time by holding the switch. This requires more skill and is prone to variation, making it suitable for small batches or occasional jobs.
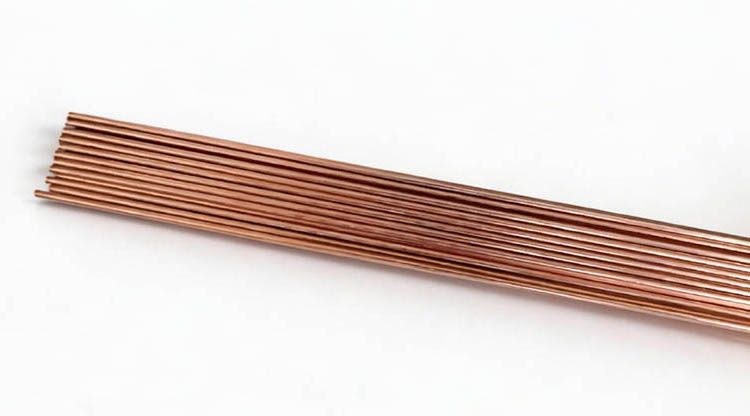
1.Incomplete fusion: This is the most common issue, often causing spot failure under load. Causes include insufficient current, too short arc time, excessive joint gap, or surface contamination. Correction: increase current or time, clamp pieces tightly, and ensure thorough cleaning.
2.Burn-through or holes: Typically caused by excessive current, too long arc time, or inadequate heat dissipation. Correction: reduce parameters, increase spot spacing to allow cooling, and ensure tight fit‑up.
3.Oxidized or blackened spots: Indicates inadequate argon shielding, wind interference, or premature torch movement before the gas post‑flow stops. Correction: increase gas flow, ensure wind shielding, and use the post‑flow function.
4.Porosity: Caused by oil or moisture on the base metal, impure argon, or a leaking gas line. Correction: clean thoroughly with solvent, check connections, and use high‑purity argon.
5.Inconsistent spot size: Usually results from manual timing variation, worn or contaminated tungsten, or inconsistent arc length. Correction: use timed spot mode, regrind tungsten, and maintain stable arc length.
5.Inconsistent spot size: Usually results from manual timing variation, worn or contaminated tungsten, or inconsistent arc length. Correction: use timed spot mode, regrind tungsten, and maintain stable arc length.
6.Tungsten inclusion: Occurs when the tungsten contacts the molten pool or when excessive stick‑out allows the electrode to overheat and spall. Once embedded, tungsten particles cannot be removed by post‑weld cleaning and compromise mechanical properties. Correction: maintain proper stick‑out (3-5mm), use correct current settings, and avoid dipping the tungsten into the puddle. Remove the inclusion by grinding out the affected area and rewelding.
VI. Material-Specific Considerations
Focus on oxidation prevention. Use post‑flow gas shielding and keep the torch in place for 3-5 seconds after arc extinction. Control heat input to avoid sensitization (especially in the 450-850°C range).
AC mode is mandatory for oxide cleaning. The surface oxide must be removed thoroughly before welding. Because aluminum conducts heat quickly, higher current and different timing settings are needed — never use the same parameters as for stainless steel.
Requires strict argon shielding on both the front and back sides. The hot zone must never be exposed to air. High‑purity argon (99.995% or higher) is recommended.
VII. Quality Inspection
1.Visual inspection is the first line of defense: a good spot should have a clean, slightly concave surface with a smooth edge transition and a bright metallic color.
2.For destructive testing, the peel test is common: clamp the welded lap joint in a vise and apply force to peel the sheets apart. The spot should pull a button of material from one sheet rather than separating cleanly at the fusion line.
VIII. Safety and Field Practice
Never attempt TIG spot welding without adequate argon shielding. Do not rely solely on increased current to achieve penetration — it often causes burn‑through. Avoid continuous dense spot patterns without allowing cooling time, as heat accumulation causes warping. Keep the tungsten free from contamination, and when tungsten inclusion occurs, remove the affected spot by grinding and re‑weld. For critical load‑bearing structures, TIG spot welding should not be used as the sole joining method — use continuous fillet or groove welds for permanent structural connections.
Post time: Jul-31-2026